
First of all I’d like to emphasize that it’s not recommended. It’s alright if you just want to test it or demonstrate it for a few people. But for a live, production environment you shouldn’t upload your Laravel app to a shared hosting.
Why? One of the main reasons are performance issues. Since multiple websites are hosted on the same server, if one website experiences significant increase in traffic, then it could affect the performance of other websites as well. Furthermore, most shared hostings limit CPU, bandwidth, disk usage and don’t provide key features like SSH access or the ability to run Composer or NodeJS. Even if they do, they won’t allow you to run more complex scripts or to install missing system libraries for your project.
At the end of this article I give you some tips about where you should host your Laravel project.
Uploading the files
In this tutorial I’ll use cPanel because that’s the most popular and common webhosting administration interface they provide.
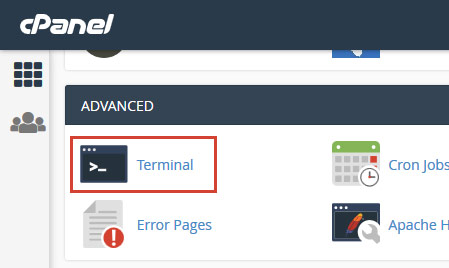
Log in to your cPanel (or similar interface) and check if you have SSH Terminal or SSH Access menu. Via the Terminal you can run commands on your server directly from the browser. If you have only an SSH Access menu, then you need to generate a key and use it log in with an SSH client. For more information about this you may want to read our How to SSH into your shared hosting webserver tutorial.
Once you have the SSH terminal command line, type the following command:
composer -V
If you use node modules in your project (i.e. you have a node_modules folder in your project), run the following command as well:
npm -v
In both cases you should see a version number, e.g.: Composer version 1.7.2 2018-08-16 16:57:12. If you can see them, you should proceed to method #1. If not, you should proceed to method #2.
Method #1: shared hosting has SSH access and Composer
This is your Laravel (5.6+) app directory structure on your localhost:
/project/
|-- app
|-- bootstrap
|-- config
|-- database
|-- node_modules
|-- public
|-- resources
|-- routes
|-- storage
|-- tests
|-- vendor
... and the rest of the files
Log in to your webserver via FTP with your preferred FTP client and create a new folder for your project in the root directory. I’ll call it my_project for this demo. Important: root directory is not the [www] or [public_html] directory, it’s one level above that!
Upload the contents of your project folder to this my_project folder except: node_modules, public and vendor folders.
Upload the contents of your public folder to the public_html or www folder. The www folder is usually just a shortcut to the public_html folder. The structure on your server should look like this now:
/
|-- ...
|-- access-logs
|-- bin
|-- cache
|-- my_project
    |-- app
    |-- bootstrap
    |-- config
    |-- database
    |-- resources
    |-- routes
    |-- storage
    |-- tests
    .editorconfig
    .env
    .gitattributes
    .gitignore
    artisan
    composer.json
    composer.lock
    package.json
    ... and the rest of the files
|-- etc
|-- logs
|-- mail
|-- php
|-- public_html
    |-- css
    |-- js
    |-- svg
    .htaccess
    favicon.ico
    index.php
    robots.txt
|-- ssl
|-- tmp
|-- var
|-- www
...
In the SSH Terminal navigate into my_project folder. In case you’re not familiar with the basic commands:
- ll or ls: list all folders in the current directory
- cd directory_name: enter a directory
- cd ..: exit from current directory (go a level above)
Then run the following command to install the vendor folder for Laravel:
composer install
If you have node modules, install them by running:
npm i
Now you should see a success feedback in the terminal and a new vendor and node_nodules folder in your my_project directory. To skip the next section, click here.
Method #2: shared hosting doesn’t have SSH access or doesn’t have Composer
Unfortunately in this case you need to upload all files, even the vendor and node_modules folders. Since it would take too much time via FTP, we will put them into one ZIP file and upload that via FTP. This is your Laravel (5.6+) app directory structure on your localhost:
/project/
|-- app
|-- bootstrap
|-- config
|-- database
|-- node_modules
|-- public
|-- resources
|-- routes
|-- storage
|-- tests
|-- vendor
... and the rest of the files
Select all files and folders inside your project directory except the public folder and put them into a ZIP archive. If you’re on Windows: right-click on selection and choose Send to / Compressed (zipped) folder menu.
Log in to your webserver via FTP with your preferred FTP client and create a new folder for your project in the root directory. I’ll call it my_project for this demo. Important: root directory is not the [www] or [public_html] directory, it’s one level above that! Now upload the ZIP file into the my_project folder.
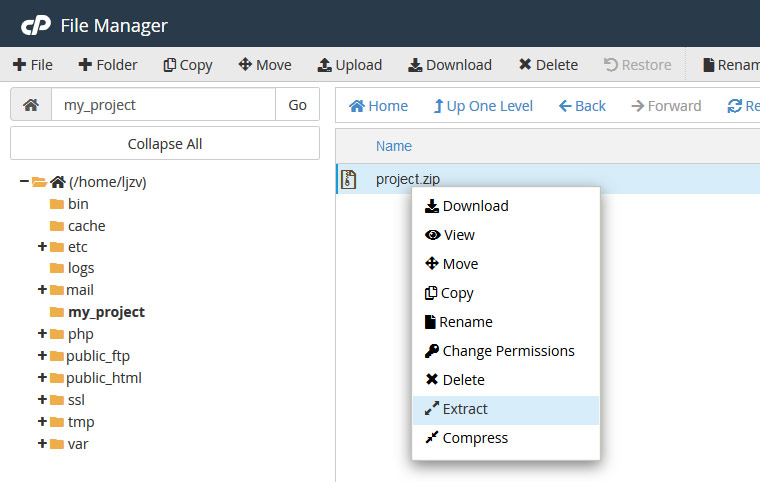
In cPanel go to File Manager menu, navigate into my_project directory, right-click on the uploaded ZIP file and select Extract.
Finally upload the contents of your public folder to the public_html or www folder via FTP. The www folder is usually just a shortcut to the public_html folder. The structure on your server should look like this now:
/
|-- ...
|-- access-logs
|-- bin
|-- cache
|-- my_project
    |-- app
    |-- bootstrap
    |-- config
    |-- database
    |-- node_modules
    |-- resources
    |-- routes
    |-- storage
    |-- tests
    |-- vendor
    .editorconfig
    .env
    .gitattributes
    .gitignore
    artisan
    composer.json
    composer.lock
    package.json
    ... and the rest of the files
|-- etc
|-- logs
|-- mail
|-- php
|-- public_html
    |-- css
    |-- js
    |-- svg
    .htaccess
    favicon.ico
    index.php
    robots.txt
|-- ssl
|-- tmp
|-- var
|-- www
...
Uploading the database
Most likely you’re using a database in your project as well. I’ll use a MySQL database as an example for this demo. Open your preferred database client on localhost, for example phpMyAdmin, select the database you’re using for the Laravel project and export it in SQL format.

Now go to cPanel, open the MySQL Databases menu and create a database for the project (if you don’t have already). Then in cPanel open phpMyAdmin menu, select the project’s database, click on Import tab and import the SQL file that you exported above. Make sure you select SQL as Format for the import.
Configuring the app
Let’s modify the public_html/index.php file. Find the following lines:
require __DIR__.'/../vendor/autoload.php';

$app = require_once __DIR__.'/../bootstrap/app.php';
And change them to reflect the real path. So in our case they will become:
require __DIR__.'/../my_project/vendor/autoload.php';

$app = require_once __DIR__.'/../my_project/bootstrap/app.php';
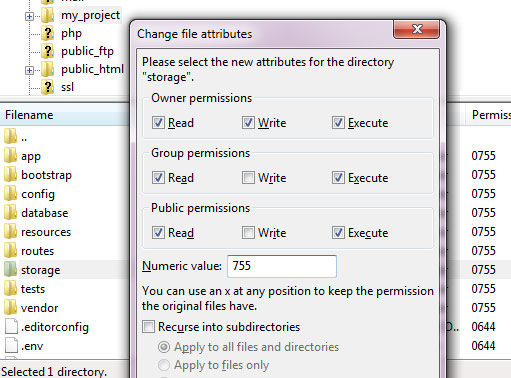
Make sure that folders within the storage and the bootstrap/cache directories are writable by your web server or Laravel won’t run. With an FTP client like FileZilla you can easily change these settings.
Finally modify your application variables in the my_project/.env file. Change the application URL, database access info, SMTP, etc. If everything went well, you should see your working Laravel project now.
If you see a blank page, enable error reporting on your server to see what the problem is. Also make sure that you’re running PHP 7. You can change PHP version in cPanel’s PHP Selector menu.
Where should I host my Laravel project?
If you just started and don’t have any experience with Cloud hosting, then I suggest you the Managed VPS solution. Basically it’s a dedicated server with SSD storage, scaling options and lots of other things that will ensure good security and performance. However, you don’t have to worry about server configurations, updates, etc., because they will handle that for you. Check our hand-picked providers below:

FastComet
No cancellation fee, no contract and 7 days money-back guarantee.

A2 Hosting
Anytime money back guarantee and free site transfer.
If you have a more serious Laravel project or you want to control every detail, you should go with a Cloud hosting solution. Some of them might require more experience, however they have a very easy-to-use interface, extensive documentation and great support as well.

CloudWays
You can select from the best and most popular cloud providers in one place. Start and manage your own server with a few clicks.

RunCloud
A painless way to manage web servers, without the need to use confusing command line. Very affordable price, 5 day trial.
Good luck and happy coding!