
Secure Shell or SSH is a communication standard which provides a secure way to access a computer over an unsecured network. It has strong authentication and data is encrypted between the two computers. With SSH you can execute commands, manage systems and applications remotely. For example you can use it to run Composer or NPM commands.
Most webhosting provider uses cPanel as a webhosting manager interface, so I’ll use that in this article. Let’s begin!
What is public and private SSH key?
SSH can work with password authentication, but the better and safer way is to use public key cryptography instead. Basically you need to create a key pair: a public and a private one. The Public key can be used to encrypt messages, but not decrypt them. It resides on the remote server. The Private key can decrypt messages encrypted with the public key. It resides locally on your computer. When you attempt to login to the server, the public and private keys are compared. If they match, you are allowed to to login.
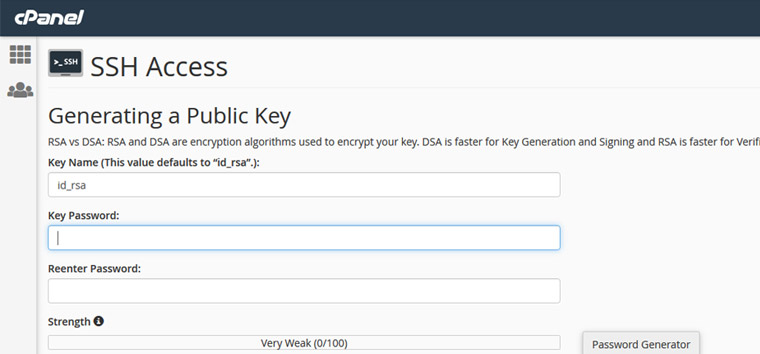
Generate public SSH key
Log in to your cPanel and under the Security section click on SSH Access.
Click the Manage SSH keys button, then Generate a New Key.
Enter a strong password for the key and click on Generate Key.
You will see a Key Generation Complete! message.
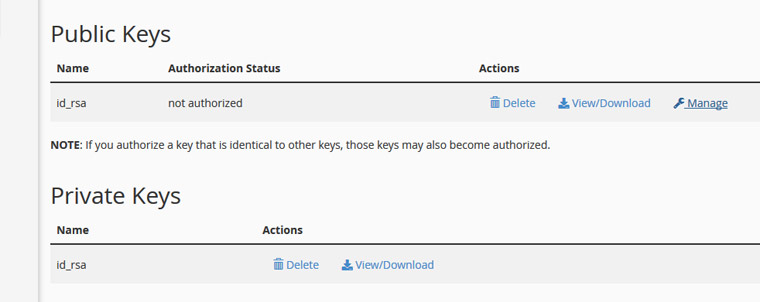
Authorize public SSH key
Now the key needs to be authorized to grant access to the server. Go back to the Manage SSH keys page and under the Public keys section click on Manage next to your new key.
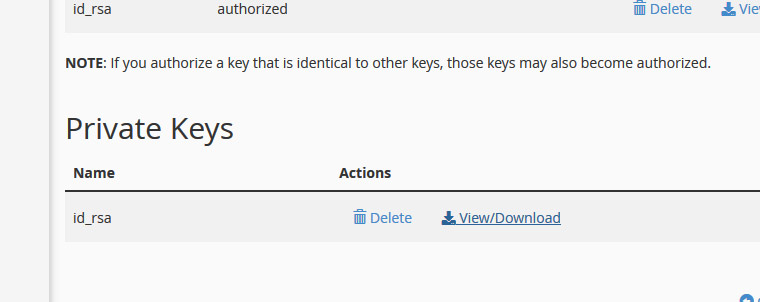
Click on Authorize button. You will see a message stating: The key “id_rsa.pub” has been authorized.
Convert and Download the SSH key
Now we need to convert the private key into PPK format, so we can import it in our SSH client. Go back to the Manage SSH keys page and under the Private keys section click on View/Download next to your private key.
Scroll down to the Convert the “id_rsa” key to PPK format: section, enter the password you used at key generation and click Convert. Click on Download Key and save it on your computer.
SSH with PuTTY
PuTTY is a simple SSH client, you can download it here. Install and open it.
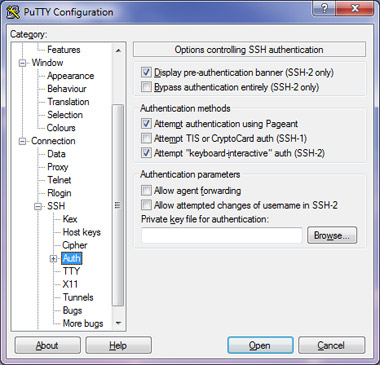
Under Connection click SSH, then Auth.
Click Browse under Private key for authentication and find the PPK file you downloaded previously.
Click Session on the left and enter your domain name or IP address of your server.
Click Yes in the security warning window.
You will see Login as. Type your cPanel username and hit Enter. Then enter the password of your public key and hit Enter. PuTTY won’t display the characters for security reasons. Now you should see the terminal and you can start typing your commands.
Basic SSH Commands
Most webhosting server runs on Linux so I’ll list its basic commands. Note: if you’re on a shared webhosting, then root access is unavailable for obvious security reasons. Therefore your possibilities are limited.
- ls – Show directory contents.
- ll – Show directory contents.
- cd – Change Directory.
cd DirectoryNameto open a directory.cd ..to go one level up.cdto go to the root. - mkdir – Create a new folder (directory).
- touch – Create a new file.
- rm – Remove a file.
- cat – Show contents of a file.
- pwd – Show current directory (full path to where you are right now).
- cp – Copy file/folder.
- mv – Move file/folder.
- grep – Search for a specific phrase in file/lines.
- find – Search files and directories.
- vi/nano – Text editors.
- history – Show last 50 used commands.
- clear – Clear the terminal screen.
- tar, zip – Create & Unpack compressed archives.
- wget – Download files from the internet.
- du – Get file size.
- CTRL + c – Exit from a process.
- exit – Exit from PuTTY.
Type help for more information about the available commands.
Good luck and have fun!